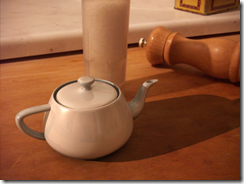
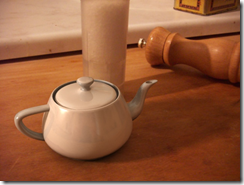
Part 2: Marrying 3D with a photo :
打光、調明暗立體、合影子:加入一個mr Area Ommi (不過我覺得用mr Area Spot 比較好控制方向)。
調整光度及影子等相參數,但如果加強明暗立體效果,則用MSR材質中的AO來控制(相關AO在第三篇介面說明)。
Now you’ll tune the lighting in the scene. Generally you need at least one key light to cast a directional shadow.
- Add a light source such as mr Area Omni and place it in a location similar to where the main light seems to be coming from in the photo.
- Tune the light so that the lighting direction and intensity on the teapot seems reasonable compared to the objects in the photo, and so the shadow directions seem to match. For now, ignore the shadow intensity; just consider the lighting on the teapot itself.
- Now tune the overall intensity of the shadow with the Ambient/Shadow Intensity parameter to match existing shadows in the photo. If the shadow needs tinting(色彩/濃淡), use the Ambient/Shadow Color setting. You might also need to modify the AO Max Distance value to make contact shadows more or less pronounced.
- You can adjust the shadow softness with the mr Area Omni light’s Radius setting, on the Area Light Parameters rollout.
- The scene is now set up, although further tuning might be necessary.
- Delete the teapot.
- Add any objects you want to use to the scene.
- Add any additional stand-in matte objects that you can use to occlude objects, receive and cast shadows, etc., to the scene, and apply the same Matte/Shadow/Reflection material to them.
Part 3: Prepare for compositing:合成前的準備
- 打開材質編輯器,Cut掉 E/B Switcher 中的 Background的值,改設純黑(或藍/綠布幕)值。
>>>這個做法保留彩現時有環境/反射效果能力。 - 也Cut掉MSR Material 中的 Camera mapped background,並設一個新的E/B Switcher shader。
在新貼E/B Switcher shader 圖中,只設定Environment/Reflections中instance上背圖(就是E/B camera map)。
>>>使matte做布幕的純色彩現,而加新Switcher這個部份能保留對3D物件的有matte時的彩現效果。
這個部份就會要讓3D物件的彩現能受到matte物件及環境反射光的影響。但又不把matte物件及背景圖彩現出來。
So far(到目前為止) the rendered 3D content has been added on top of the background directly in the renderer. Generally, you want to do this in an external compositing program, as follows:
- Open the Material Editor.
- Environment/Background Switcher shader (the one you instanced from the Environment panel).
Right-click the Background map button and choose Cut. - Click the color swatch(樣本) next to Background and make sure the color is transparent black; in other words, Red, Green, Blue, and Alpha all equal 0.0. These are the default values, so no changes should be necessary. Close the Color Selector dialog.
- Activate the Matte/Shadow/Reflection material and cut the Camera Mapped Background map.
- To the Matte/Shadow/Reflection material > Camera Mapped Background map, apply a new Environment/Background Switcher shader.
- Right click the Environment/Reflection map button (not the Background map button) and choose Paste (Instance) to apply the previously used map.
- Click the Background color swatch and make sure the color is transparent black as well.
The scene now contains two Switcher nodes: one used in the environment (switching between transparent black and the chrome ball) and one in the material (switching between transparent black and the camera map).
If you render now, the resulting image still properly contains all the reflections, light, etc., from the background, but not the background itself. Shadows exist in the alpha channel, so the image is suitable for compositing directly on top of the background image.
A Note on Gamma
The preceding procedure did not mention gamma.
If you use a gamma-correct workflow, which yields a superior result, with literal mental ray textures (that is, you use the big Browse button to reffer directly to a bitmap file, rather than inseriting a Bitmap map), you must set the gamma of this bitmap explicitly in the appropriate Reverse Gamma Correction parameters.
Note: Intentionally exaggerating the Reverse Gamma Correction setting on the chrome ball photo can turn a low-dynamic-range photo into a “faux” HDR image by artificially exaggerating its contrast.


沒有留言:
張貼留言