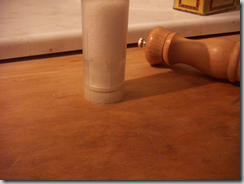
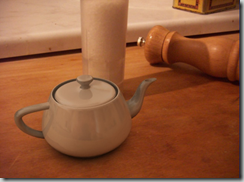
僅供參考:
Matte/Shadow/Reflection (mi) Material
Material Editor > Type button > Material/Map Browser > Matte/Shadow/Reflection (mi)
Note : 這個材質球只能用mental ray renderer做算圖。
The Matte/Shadow/Reflection (mi) material appears in the Browser only if the mental ray renderer is the currently active renderer.
The Matte/Shadow/Reflection (mi) material, part of the Production Shaders library, is used to create “matte objects”; that is, objects that represent代理 real-world objects in a photograph, used as the scene background (also known as the plate).
The material provides a wealth of options for marrying a photographic background with the 3D scene, including support for bump mapping, ambient occlusion, and indirect illumination.
(MSR 材質,建造一個代替背景圖的3D遮罩物件(Matte Object),能有凹凸感、明暗立體、及對間接光度等功能。)
Applications include(應用包含):
- Blocking another 3D object from the camera view, thus allowing the 3D object to appear to be behind the object in the photo.
(在做圖時,3D物件的部份在matte物件後面,使3D物件被看來像是排放在背景圖的物件後方。)
PS.這裡matte物件通常會很準確畫出背景圖內的物件外型。 - Allowing 3D objects to cast shadows and occlusion on and receive shadows from objects in the photo.
(在做圖時,可以把3D物件的影子投在matte物件上。) - Adding reflections of 3D objects to objects in the photo.
(在做圖時,可以接收來自接3D物件的反射光。) - Allowing the interplay of indirect light between 3D objects and objects in the photo.
(在個圖時,讓3D物件與matte物件之間的反射光。)
In all these cases the material is applied to a matte object that represents an object in the background plate, and the 3D object uses a traditional material.
For additional information, see Help menu > Additional Help > mr Production Shader Library > Matte/Shadow Objects and CameraMaps, as well as the Tech Note (following).
Tech Note
The Matte/Shadow/Reflection shader works by doing a form of differential shading. In other words, it determines(決定) the amount of light a point would receive if it were not in shadow, compares it to the amount of light the point actually receives, and shades it by the relative difference.
This means that any point that is fully lit(完全地被照亮), unshadowed by any object, returns the same color it already had, completely disregarding(不顧) the actual intensity of that light. If half of the incoming light is blocked, the point will be shaded at 50 percent intensity, regardless of the full-intensity amount in an absolute sense.
An important feature of the Matte/Shadow/Reflection material is that it is non-self-shadowing自己沒有影子, non-self-occluding自己沒有明暗立化, non-self- reflecting自己不反射, and does not cast indirect light onto itself不被間接光投射). Because it is designed to act as a stand-in(替身) for objects present in a photographic plate, which already contains self-shadowing, self-reflection, and so on, the material automatically excludes these effects. However, it is still able to cast shadows on other objects, receive shadows from other objects, reflect other objects, and so on, without creating unwanted double shadows or double reflections for such effects already present in the plate.
Procedure(步驟)
This multi-part procedure provides step-by-step instructions(講授) for a simple case of combining a 3D object with a photograph using the Matte/Shadow/Reflection material, the Environment/Background Camera Map shader, and the Environment Probe(探測)/Chrome(鉻黃) Ball shader.
Prerequisites(事先準備):
- A photo of a background
- A photo of a chrome ball, also known as a light probe, shot from the same camera angle and cropped(切剪) so the edges touch the image.
Ideally(理想地), these should be HDR(高資料率) photos, but non-HDR images can also work well.
Part 1 : To use the production shaders to marry a 3D scene with a photographic background :
Step1: 設定好(Perspective) Viewport的背景圖片,並注意用MR Renderer。
- Make sure mental ray is the active renderer.
(確定是用Mental Ray 算圖器。) - Activate a Perspective viewport. Use Viewport Background to set the background image (see the procedure introduction, above) .
(在透視視窗中,設定背景圖。) - On the Viewport Background dialog, make sure both Display Background and Match Rendering Output are on. Click OK to continue.
(在 ViewPort Background對話視中,(直接用files選取背景圖檔。)注意Display Background and Match Rendering 是開啟。)
Step2: 用"E/B"這一系列的2D貼圖來作環境/特效的背景設定:
a.用Environment/Background Switcher (mi)設定背景,並instance到材質球。
b.E/B Switch 中的 Background,及Environment reflection兩個參數中,分別貼圖:
E/B Camera map (mi)<---背景圖,拖拉instance到材質球;
E Probe/chrome ball (mi)<---反射圖,拖拉instance到材質球。
(把兩個貼圖instance到材質球<==可方便修改調整。
c.用E/B Switch (mi)
- Open the Environment And Effects dialog to the Environment panel (press 8).
開啟 環境/效果 對話視窗 - On the Common Parameters rollout, click the Environment Map button (reads “None”).
From the list that opens, choose Environment/Background Switcher (mi)
選取(環境/背景 切換器)的材質。 - Open the Material Editor.
開啓材質編輯器 - Drag the Environment Map button from the Environment And Effects dialog to a sample slot(材質球) in the Material Editor. Use the Instance option.
- On the Material Editor > Environment/Background Switcher (mi) Parameters rollout, click the Background map button (all the way to the right of the parameter). From the list that opens, choose Environment/Background Camera Map (mi).
在這個材質中按背景貼圖鈕,並設定為(環境/背景 攝影貼圖)的材質。 - On the Environment/Background Camera Map (mi) Parameters rollout, click the Browse button and again open the background image.
在攝影貼圖材質中,設定與背景一樣的圖片。 - In the Material Editor, click the Go To Parent button to return to the Switcher map.
回到上一層(切換器)中。 - Click the map button to the right of Environment/Reflections.
進入Environment/Reflections中。 - From the list that appears, choose Environment Probe/Chrome Ball (mi).
- On the Environment Probe/Chrome Ball (mi) Parameters rollout, click the Browse button and open the image containing the cropped photo of the chrome ball.
If the two photos have different exposures, use the Multiplier setting for either or both maps to match them.
Step3: 設定物件的材質:
- 建立簡單的(幾個)平面物件來替代背景中的場景(如地面、牆、遮蔽物),並配到視覺透視的 角度。
建立一個標準的Skylight,color用Scene Environment。<---適度回收Ambient Color。 - 建立用Arch & Design material的幾何物件。
- 建立MSR Material , 在Camera Mapped Background:用instance貼上從E/B Switch 中 Background Copy來的貼圖。
- 測試算圖,可以得3D物件與2D背景的合成。有柔和的環境陰影。
Next you’ll make a rudimentary model(基本的模型) that represents objects already present in the background. At the very least you need a simple plane for the "ground" to place things on.
Note: It is easier to see if you maximize the viewport and use wireframe display mode.
- Align the viewport so it matches the angle of the photograph as closely as possible.
儘可能把視覺角度配合到背景圖。 - From the Create menu, choose Lights > Standard Lights > Skylight and then click in the Perspective viewport to add a Skylight to the scene.
建立一個標準的 Skylight. - On the Skylight Parameters rollout for the light, set Sky Color to Use Scene Environment.
This retrieves(收回) the appropriate(適當) ambient color from the chrome ball photo. - Create some geometry. For this example, add a plane to represent(代表) the ground.
- Add a teapot on top of the plane. You’ll use this temporarily to tune the shadows.
- In the Material Editor, create an Arch & Design material, change the color to white, and apply it to the teapot.
- Select the ground plane. Next you’ll set up the Matte/Shadow/Reflection material.
- In the Material Editor, activate the existing Environment/Background Switcher map.
- Right-click the Background map button and choose Copy.
- Activate an unused sample sphere and create a new Matte/Shadow/Reflection material.
- On the Matte/Shadow/Reflection Parameters rollout, right-click the Camera Mapped Background map button and choose Paste (Instance).
(先建立一個新的 Matte/Shadow/Reflection material,並將E/B Switch中的Background值,用Instance的方式paste 到這新材質中的 Camera Mapped Background中。)
PS.直接在Switch的Background拉出一個新的材質球,會有問題。
This places the same background map that is used in the environment switcher into the background map in the material as an instance.
This completes the basic setup. If you render now, you should see the teapot superimposed over the background image. The teapot should have a soft shadow underneath, which comes from the ambient occlusion.
(在這裡如果先做render的話,可以算出如下面的合成圖,在teapot底部會有柔和的環境陰影。)


沒有留言:
張貼留言